I feel as if this One Room Challenge is just flying by so incredibly quickly, and more importantly, smoothly. This week I decided to get out of the house for a bit and start shopping for all of the little accents pieces I plan on using to decorate our newly refined space. But, before I head into those details, I wanted to discuss what was completed this week. I'll be talking about the accents I purchased in the next following weeks. As for the completion of week 2, so many good things happened and I am so excited to share them with you all.
First item of business, this incredible miniature pantry. It is officially completed. When I found my cabinet and shelving guy, it was a godsend. He was efficient, inexpensive and most importantly quick. (It is virtually impossible to find all three things in one contractor....I know this from multiple GC's that have entered, and exited my life in the passed 4+ years. So my contractor, Jason, had this mini-pantry completed within a week. Seems a bit long but let me explain. One week from the time of our first consultation, to him ordering and receiving the drawer fronts, to installation. Not bad at all. Mind you, everything fits like a glove. If I was installing and measuring, you bet your butt it would take me a minimum of three weeks to get the measurements correct. (In case you were not aware, there a things I am incapable of doing - 1. measuring- it's humorous how I cannot measure to save my life. 2. dates - anything that is scheduled on specific dates I manage to royally mess up - case and point - my husband and my honeymoon. We may or may not have checked out of our honeymoon cabin in North Carolina two days early - whoops. So the fact that I am able to keep up with the ORC, and have my timeline in order is a flipping miracle). Anyway, as I get completely sidetracked with my flaws as a human being, I ran out to Hobby Lobby, grabbed my hardware for the drawer fronts - because Hobby Lobby has the best, and most original, hardware available for purchase in any brick and mortar - prove me wrong, and tada! Completed!
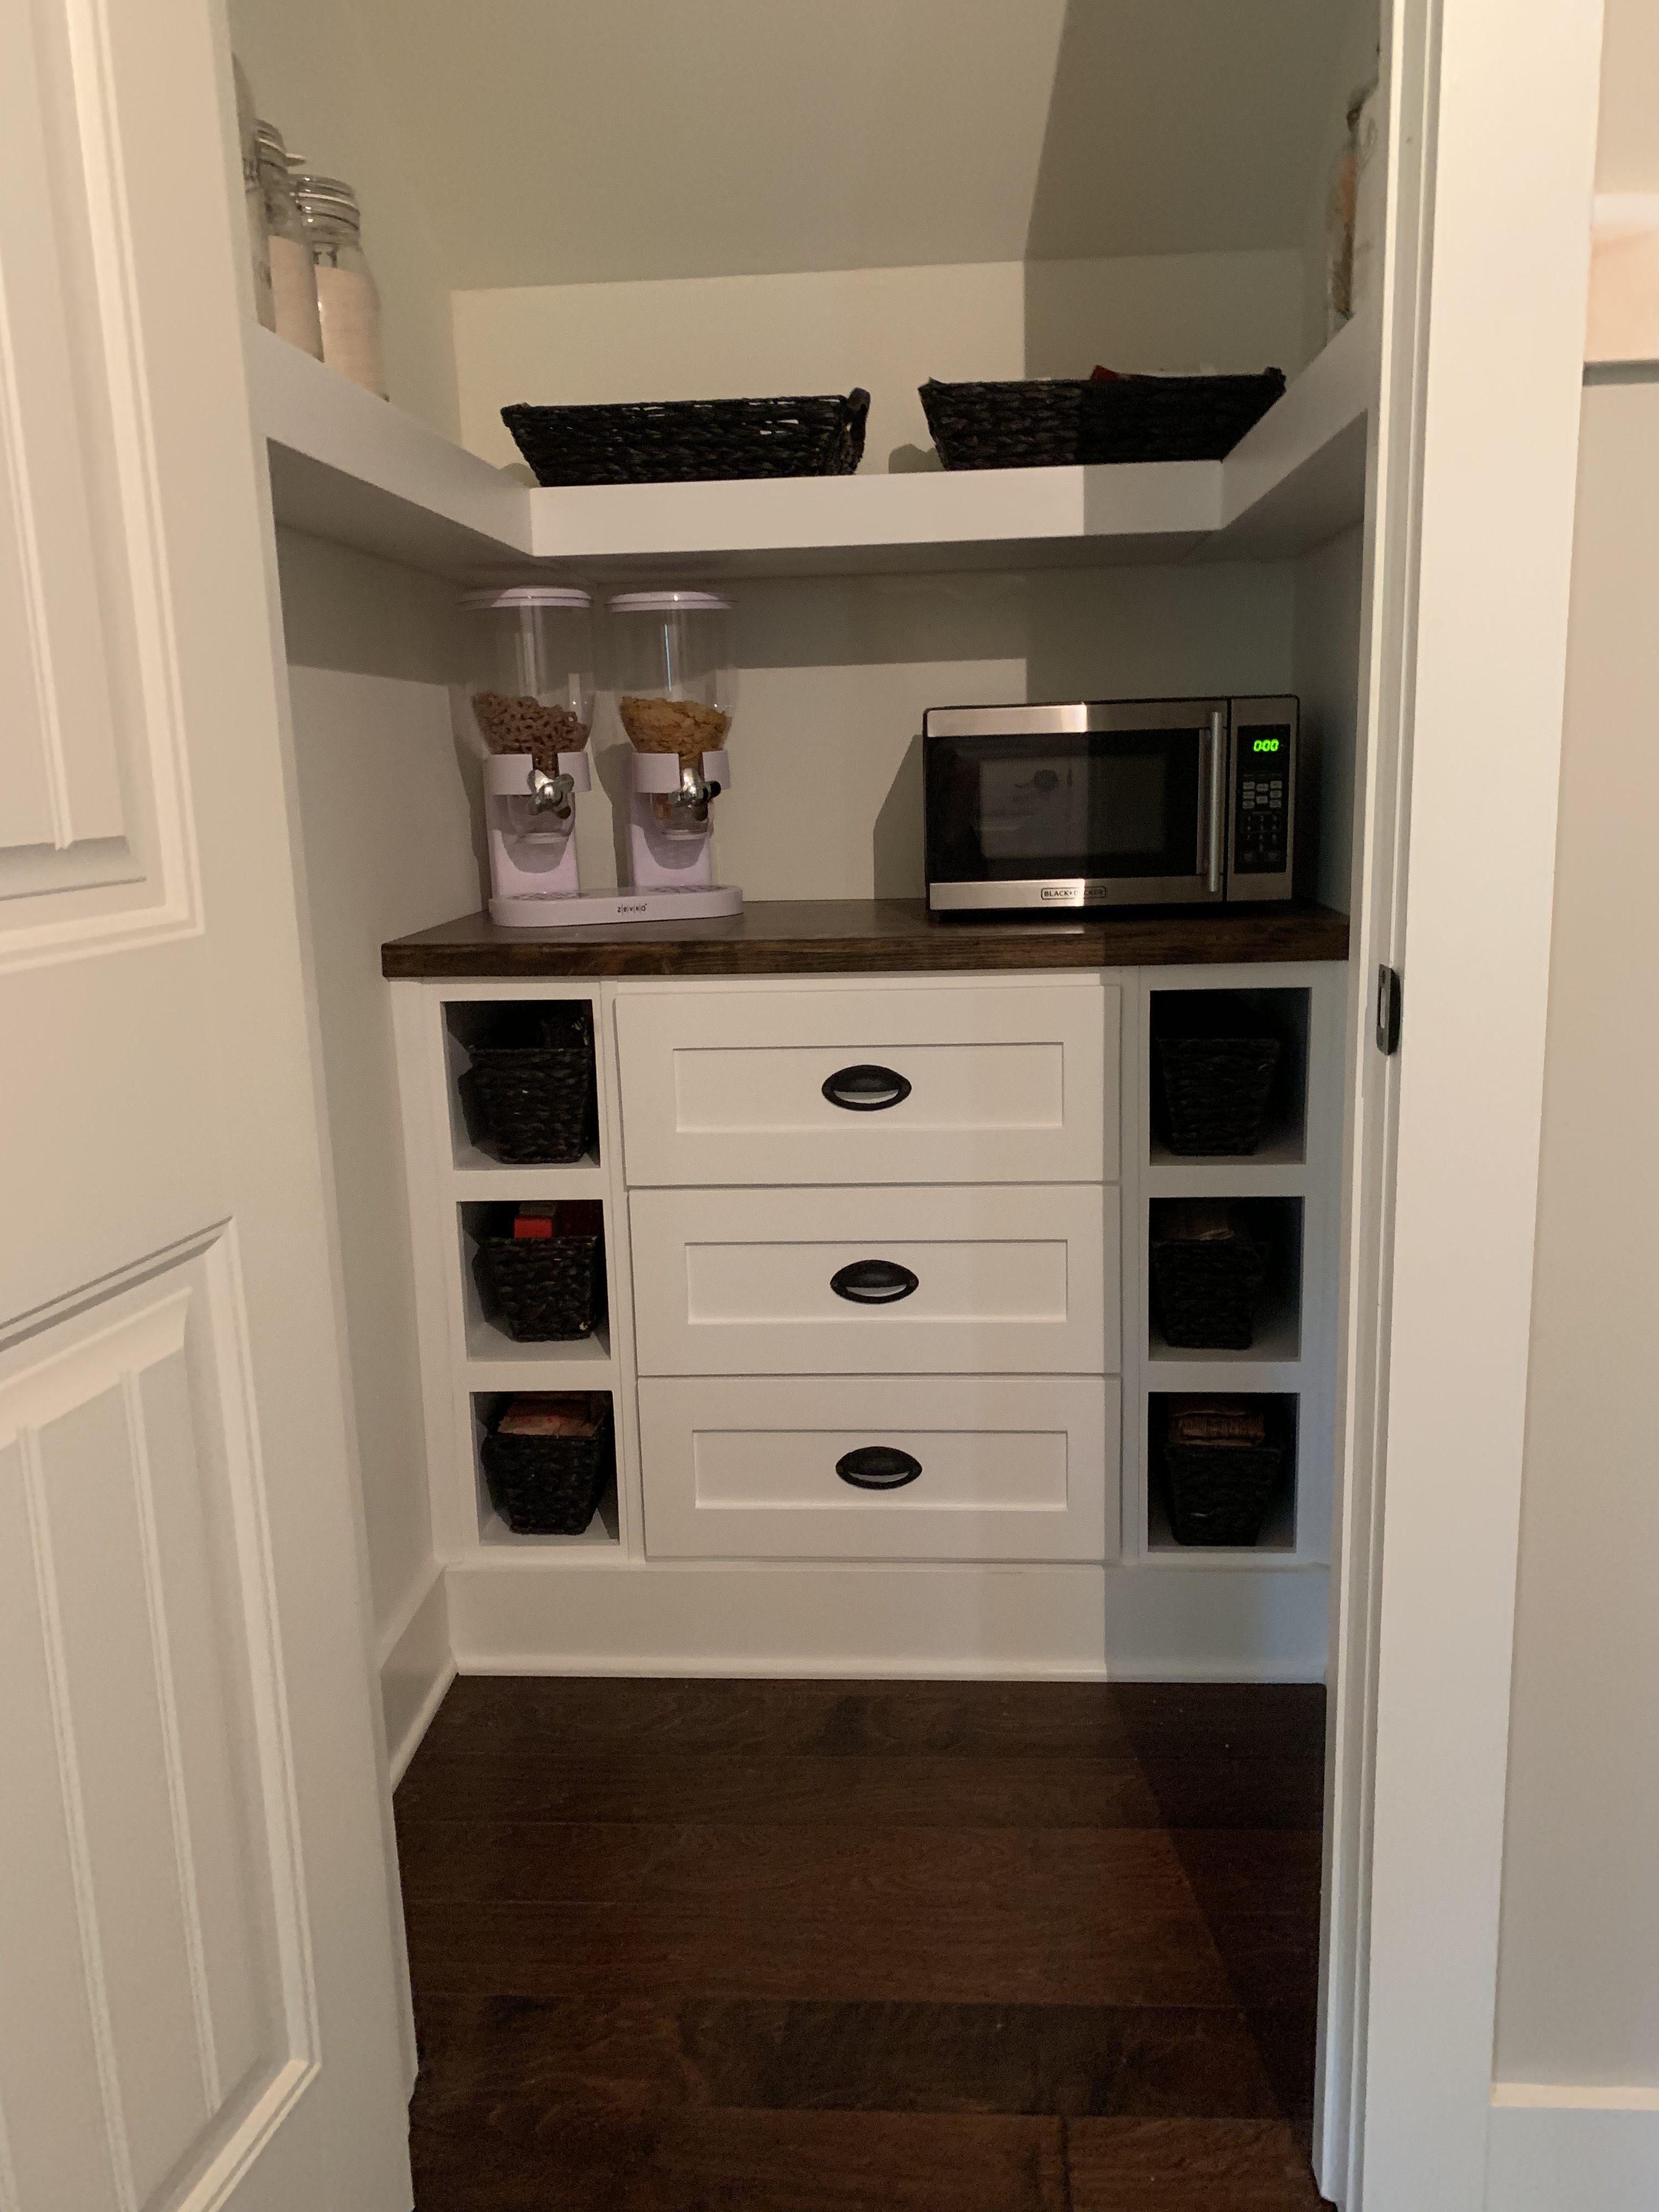 Just look at how perfect the hardware flows with the baskets I found at Big Lots last week.
So, since Jason was so timely with the pantry, after he completed this project, I said "ya know what? We all know my measuring inabilities, will you do my board and batten for me too?" And wouldn't ya know .. completed by the next business day. Seriously, if anyone needs a reliable contractor in the North Atlanta region - DO NOT hesitate to contact me, he is too good to keep all to ourselves.
So, Jason installed the board and batten but I had said I would paint. Ugh, another thing I am just not good at. Painting walls. I think I am hands down the messiest, sloppiest painter in all the land. (But I have to tell you, a nice thing about having these particular engineered hardwoods is that the paint wipes right off). This hallway took him about two hours to complete, and throughout the entire process all I could think of was "I do not want to paint. I do not want to paint" No, I didn't beg him to paint. I'll be conquering that in week 4.
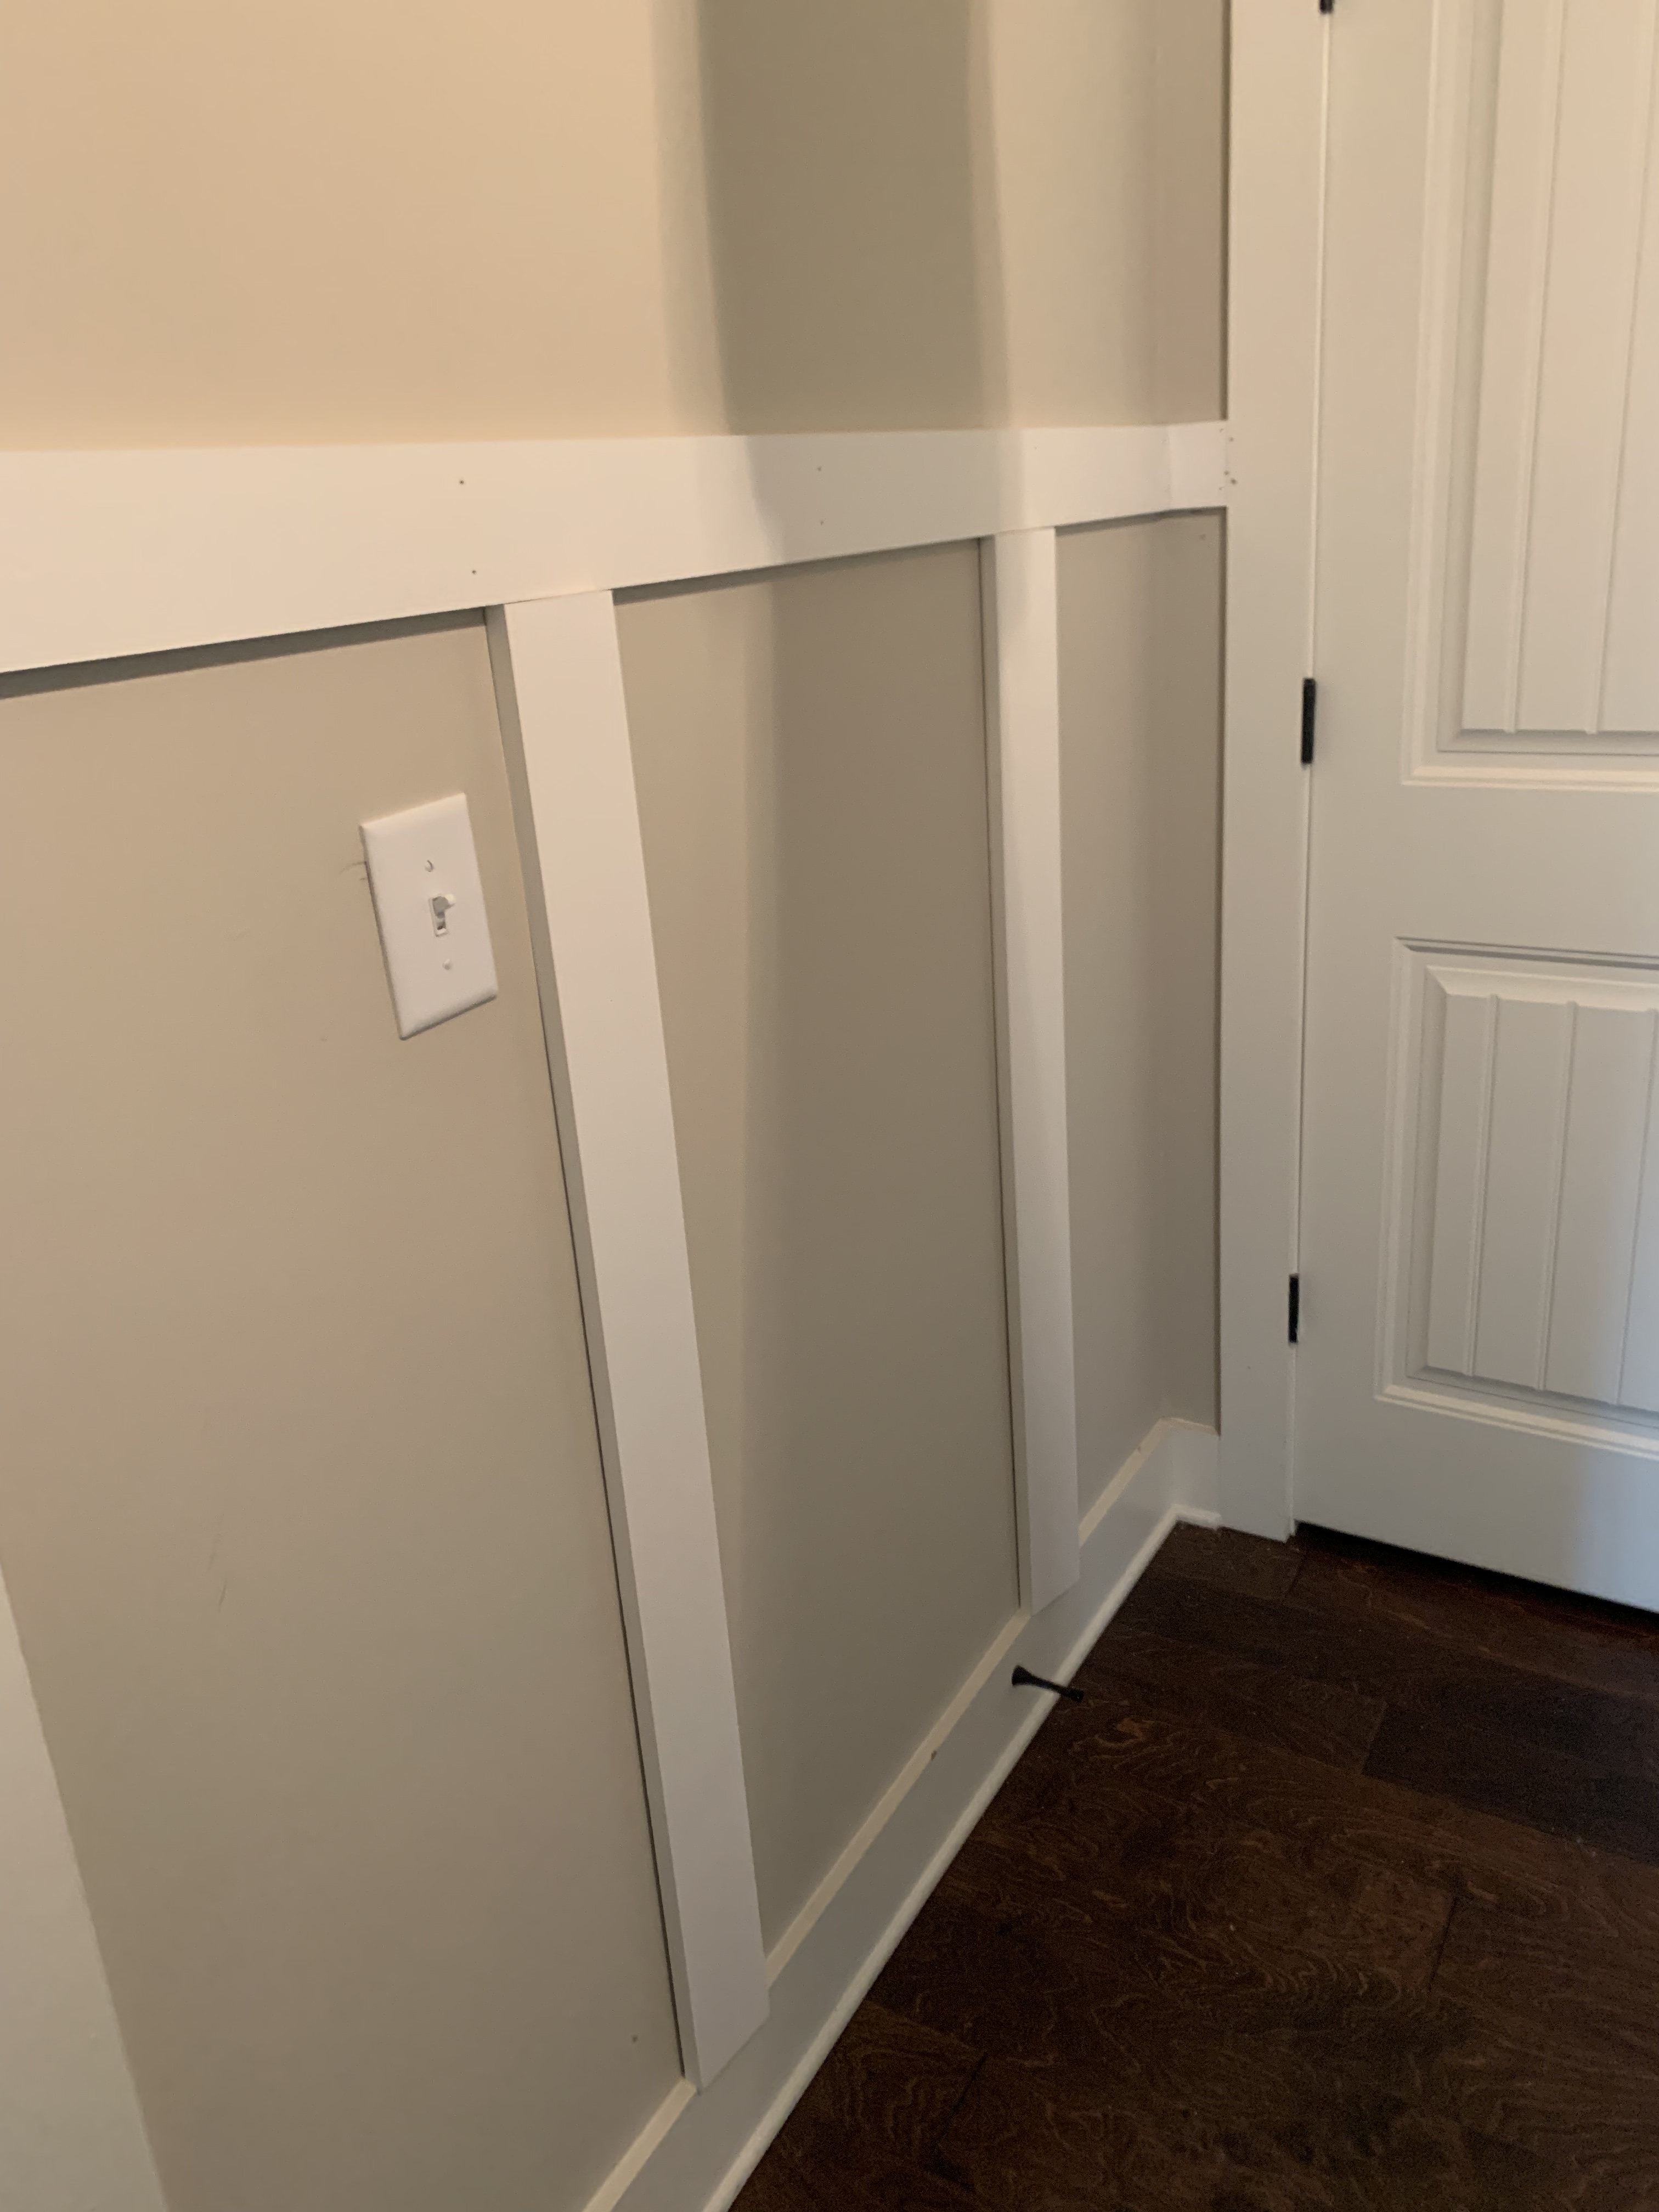
If you aren't familiar with how to install board and batten, there are a couple of ways to do it. I opted to take the easy, and affordable route. Some people choose to literally panel the walls, while adding 1x4 strips of wood on top of the paneling. That just seemed so silly to me, and quite frankly a waste of money. When we shiplapped our bedroom accent wall, I also refused to buy actual shiplap, we used plywood instead; but that is for another blog which will be written sooner than later ;). What I decided to do, as opposed to paneling, was to just have Jason install the 1x4s on top of our walls. Once painted, our hallway will look just as good as a paneled wall.
Aside from the accents I purchased, as mentioned in the beginning of my week's follow up, and the completion of all the cabinetry and woodwork, I received our new lighting. I purchased our French country inspired lighting from Amazon, for $83. Yes you read the correctly. $83. Originally, I wanted to have sconces on the wall that separates my children's bedrooms. I had decided against that however because that specific wall is actually small space , its about 5 feet long and I felt that it would look too crowded and would be total overkill. When I was searching for lighting and came across this incredibly inexpensive, yet beautiful, chandelier I knew the exact direction I was wanting to go on the lighting front. Our home is neutral. Our walls are beige with white trim. I love it. I know grey is the hot thing, and everyone swoons over the greige (grey + beige) shades, but I decided to choose shades that worked for us. I have always been a beige over grey kind of girl. When i saw this lighting fixture, my jaw dropped to the floor. Distressed white with beige undertones. It was clearly made for me and my home.
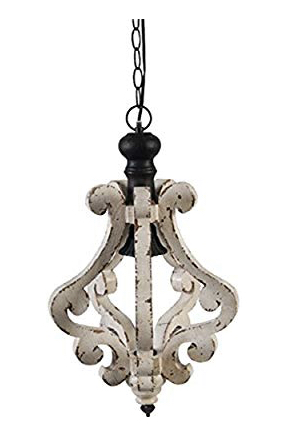
Between the shades of whites and beiges; and the black hardware, and baskets as well as the touches of black in this light fixture, everything is just coming together so perfectly. I couldn't be happier that my vision is truly coming to life with great ease.
Stay tuned for week 4, where I will be showcasing my incredible painting skills and the installation of this light fixture.